
Dub a video into another language in your own voice
Redubbing a clip used to mean a booth, a voice actor who speaks the target language, and a session to sync it. If the video is an explainer, a product demo or anything else carried by a voiceover rather than by faces, you can now do it at your desk and keep the original speaker’s voice.
Here is the workflow, including the parts that do not work as smoothly as the demos suggest.
What you need
The clip, a transcript of what is said in it, and a device that can run the model locally. That is the whole list. No studio, no cloud account.
Step 1: lift the voice out of the video
Drop the video straight in and let the app pull the audio and build a clone from it.
The catch is what else is in that audio. If there is music under the dialogue, find a stretch where the speaker is alone and use that instead. A clean ten seconds beats a noisy minute, every time. The sample quality rules matter more here than anywhere else, because a video’s audio was mixed for the video, not for cloning.
If the original recording is too messy to use, record ten seconds of the same person in a quiet room and clone from that.
Step 2: edit the script before you translate it
The tempting move is to feed the transcript to a translator and hit generate. It usually comes back too long for the shots it has to sit under.
Trim first. Spoken transcripts are full of filler, restarts and sentences that run twice as long as they need to. Cut anything the picture already says, split the long sentences, and drop the throat-clearing at the start of each section. A tighter source gives the translation room to breathe.
Step 3: translate, then actually read the translation
Machine translation is good enough for this and still gets specific things wrong in ways that are obvious to a native speaker and invisible to you:
- Product and feature names get translated when they should stay as they are.
- Numbers, dates and units change format, or do not change when they should.
- Idioms come through literally.
- The register lands wrong: too formal for a casual video, or too casual for a corporate one.
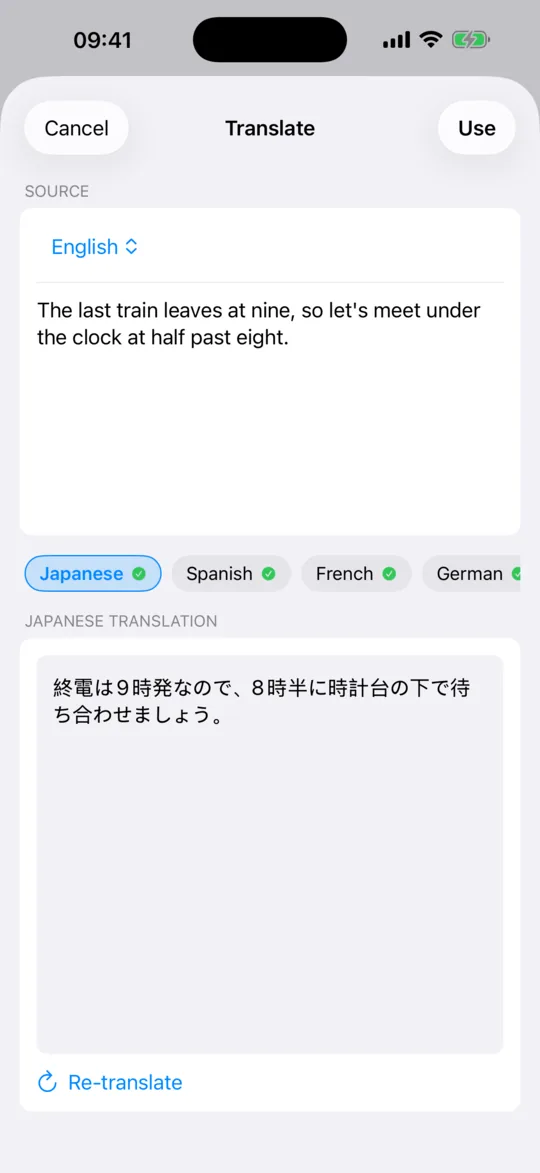
VoiceNPC translates on the device using Apple’s Translation framework, and shows you each translated section so you can fix it before it becomes audio. That preview step is worth using every time. Fixing a line here costs nothing; catching it after you have generated and placed the audio costs the whole pass.
Step 4: generate
Generate section by section rather than the whole script in one block. When one line comes out wrong you redo that line instead of the entire track.
Pick a delivery preset that matches the video. Stable for instructional narration, Expressive for something with more energy. Keep it consistent across sections, or the cuts will be audible.
Step 5: fit it back to the picture
This is the step nobody shows you, and it is where the time actually goes.
Translations do not match the source in length. German and Spanish typically run longer than English. Japanese and Chinese pack differently again. So the line that fitted the shot in English overruns it by two seconds in German.
Do not fix that by speeding the audio up. Past a few percent it sounds processed, and the voice you worked to clone starts sounding like a machine reading. Fix it in the text: cut a clause, drop an adverb, let one sentence carry across the cut instead of ending on it. Rewriting the line shorter and regenerating takes seconds and sounds like a person.
Line up the first frame of speech in each shot and let the tail float. Nobody notices a gap at the end of a shot. Everybody notices a late start.
What this does not do
- It does not lip-sync. Mouths still move to the original language.
- It does not separate music from speech. If your original export has a music bed mixed in, you cannot remove the old voice and keep the bed. Go back to the project file and export the music and effects separately.
- It does not time subtitles. You still write those yourself.
If the video has more than one speaker
Clone each of them, then build the dub as a multi-voice project with a voice assigned per section. That is also how you do a two-host podcast or a dialogue scene: one project, different voice per block, generated in one go. Projects are on the Pro tier.
Before you dub someone else’s video
Two permissions, not one. The video is one piece of rights, and the speaker’s voice is another. Cloning a voice you were not given permission to clone is the kind of shortcut that ends a project.
Everything above runs on your device, so the footage and the voice never leave it. That is one fewer thing to negotiate when the material is not yours to upload.
Questions
Does this lip-sync the video?
No. The mouths in the picture still move to the original language. This replaces the voice track, which is what most explainers, demos and voiceover-led videos need, and it is not what a lip-synced dub does.
Do I need an internet connection?
Only for the initial app and model download, and once per language pair for the translation pack. Cloning, translating and generating then run offline on the device.
Which languages can the cloned voice speak?
English, Chinese, Japanese, Korean, French, German, Spanish, Russian, Italian and Portuguese, plus Beijing and Sichuan dialects. The voice does not have to be sampled in the language you generate.
Can I keep the original background music?
Only if you have the music as a separate file. Once music and speech are mixed into one track there is no clean way to remove the voice and keep the bed, so plan for it before you export the original.
Can one script produce several languages in one pass?
Yes, on the Pro tier: pick multiple target languages and you get a separate generation for each from one input. The free tier translates to one target language at a time.